How to Use Illustrations in Photoshop: Complete Guide
EpicPxls offers 200+ curated illustrations for Photoshop, all with a commercial license and editable source files (Figma, Sketch, PSD). Download your chosen illustrations from EpicPxls, then use Photoshop's import function. Most resources include Photoshop-native files for seamless opening.
Last updated February 13, 2026
Everything you need to know about using illustrations in Photoshop.
Trusted by designers at leading companies
Top Illustrations for Photoshop
Handpicked resources from our curated collection


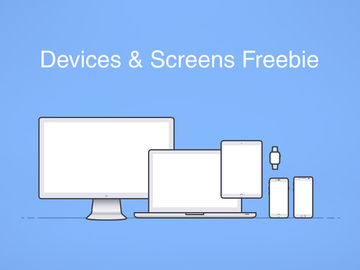
![Handdrawn Tree Graphics [PSD/PNG] preview picture](https://imgproxy.epicpxls.com/scUHRZndp5nD-wEd6JkRbxl1HypFPEny-fd2wpHQNjI/rs:fill:720:540:0/g:no/aHR0cHM6Ly9pdGVt/cy5lcGljcHhscy5j/b20vdXBsb2Fkcy9w/aG90by82ZGQ2ZDVl/NzI4YTdhYWVkMmI1/OGU3ZTBiNmMxY2Zl/YQ.jpg)
Try Our Free Resources
Download any of these for free - no account required


Getting Started with Illustrations in Photoshop
Adobe Photoshop is one of the most powerful tools for digital artists, designers, and illustrators looking to create, edit, and integrate visual content. Whether you're crafting a marketing campaign, designing a website, or building a personal art portfolio, knowing how to use illustrations in Photoshop can significantly enhance your creative workflow. Before diving into the technical steps, it's essential to ensure your environment is set up correctly. Make sure you have the latest version of Photoshop installed, as newer updates often include improved support for file formats, performance enhancements, and advanced layer management features crucial for handling illustrations.
One of the first steps in using illustrations effectively is sourcing high-quality, compatible assets. Look for resources specifically designed for Photoshop or those that support layered editing, such as PSD, AI, or SVG files. Many professional-grade illustrations come with transparent backgrounds, vector scalability, and organized layers, making them ideal for customization. A reliable source for such assets is EpicPxls, which offers a robust collection of over 200+ ready-to-use illustrations tailored for creative professionals. These resources are optimized for seamless integration into Photoshop, allowing you to focus on design rather than asset preparation.
The 200+ resources available on EpicPxls span various themes, including flat design, hand-drawn sketches, isometric icons, and modern vector graphics. Each illustration is crafted with attention to detail and compatibility, ensuring smooth performance in Photoshop. Whether you're working on branding materials, social media graphics, or app interfaces, these assets can be easily customized to match your project’s aesthetic. With consistent updates and curated collections, EpicPxls ensures you always have access to fresh, high-resolution illustrations that align with current design trends.
Before importing any illustration, verify your Photoshop preferences—especially those related to graphics processing, memory usage, and file handling. Enabling GPU acceleration can improve rendering speed when working with complex layered files, while adjusting scratch disk settings helps prevent performance bottlenecks. Once your workspace is optimized, you're ready to begin importing and manipulating illustrations with precision and efficiency.
How to Import Illustrations into Photoshop
- Download the Correct File Format: Start by downloading illustrations in formats compatible with Photoshop. The most suitable options include PSD (native Photoshop format), AI (Adobe Illustrator), and SVG (scalable vector graphics). PSD files preserve layers and editing capabilities, making them ideal for customization. If you're downloading from EpicPxls, ensure you select the Photoshop-compatible version when available.
- Locate Your Downloaded File: After downloading, navigate to your default downloads folder or the location where you saved the illustration file. Keep your files organized in project-specific folders to streamline future access.
- Launch Photoshop and Open the File: Open Adobe Photoshop and go to File > Open. Browse to the location of your illustration, select the file, and click “Open.” For PSD files, all layers and groups will load automatically, preserving the original structure.
- Use “Place Embedded” for Non-PSD Files: If your illustration is in AI, SVG, or PDF format, use File > Place Embedded. This method imports the file as a smart object, maintaining scalability and editability without rasterizing the image immediately.
- Adjust Placement and Scale: Once placed, use the transform handles to resize or reposition the illustration. Hold Shift while resizing to maintain proportions. Press Enter to confirm placement. As a smart object, you can always double-click to edit the original vector content later.
- Convert and Rasterize When Necessary: While smart objects are ideal for non-destructive editing, some effects or filters require rasterization. Right-click the layer and select Rasterize Layer only when you’re ready to apply pixel-level adjustments. Be mindful—this action cannot be undone unless you duplicate the layer first.
Photoshop supports a wide range of formats, but compatibility can vary based on version and source. For example, newer SVG features may not be fully supported in older versions of Photoshop, so always check your software version. When working with Figma exports or other design tool outputs, consider exporting as PNG with transparency or using a plugin to convert layers into PSD format. With the 200+ resources from EpicPxls, you’ll often find multiple format options, ensuring smooth integration regardless of your preferred workflow.
Step-by-Step: Working with Illustrations in Photoshop
Editing Layers and Components
Once an illustration is imported into Photoshop, the real creative work begins. Most high-quality illustrations come with layered structures, allowing for granular control over individual elements. In the Layers panel, you can toggle visibility, adjust opacity, change blending modes, or apply layer styles such as drop shadows, strokes, or gradients. This level of control is especially useful when customizing illustrations to fit a brand’s color scheme or visual identity.
To edit specific parts of an illustration—such as changing the color of a character’s shirt or modifying background elements—simply locate the corresponding layer and use adjustment tools like Hue/Saturation, Color Overlay, or Brush Tool with clipping masks. For vector-based illustrations imported as smart objects, double-click the layer thumbnail to open and edit the source file in its native application (e.g., Illustrator), then save to update it within Photoshop automatically.
Using non-destructive editing techniques, such as smart filters and adjustment layers, ensures your original illustration remains intact. This approach allows for experimentation without permanent changes, making it easier to revert or refine your design later.
Organizing Your Illustrations Library
With access to 200+ resources and potentially hundreds of custom illustrations, maintaining an organized library is critical. Create a dedicated folder structure on your computer—categorized by project, theme, or usage (e.g., “Social Media Icons,” “Landing Page Graphics”). Within Photoshop, use layer groups and clear naming conventions (e.g., “Character_Arm_Layer”) to make navigation easier.
Consider using Adobe Bridge or Lightroom to preview and tag illustration files before importing them into Photoshop. You can also leverage Photoshop’s Library panel to save frequently used assets, colors, and styles for quick access across projects. If you're working with EpicPxls illustrations, bookmark your favorite collections online and download only what you need to avoid clutter. Regularly archive unused files and back up your library to cloud storage or external drives to prevent data loss.
Exporting for Production
After finalizing your illustration edits, it’s time to export for its intended use. Photoshop offers multiple export options depending on the output medium. For web and mobile applications, go to File > Export > Save for Web (Legacy) or use the newer Export As feature. Choose PNG for high-quality images with transparency, JPEG for photographs or compressed visuals, and SVG for vector-based graphics that need to scale responsively.
When preparing illustrations for print, ensure your document is set to CMYK color mode (via Image > Mode) and a resolution of at least 300 PPI. Use File > Save As and select TIFF or high-quality PDF formats, which preserve layers and transparency when needed. Always double-check color profiles and bleed settings according to your printer’s specifications.
For teams or clients, consider creating multiple export presets to automate common format combinations. This ensures consistency across deliverables and reduces manual errors during production handoff.
Troubleshooting Common Photoshop Issues
File Won't Open
If a downloaded illustration fails to open in Photoshop, the issue may stem from version incompatibility or an unsupported file format. Older versions of Photoshop may not support newer PSD features or certain SVG elements. Always ensure your software is up to date. If you're using a file from a third-party source like EpicPxls, check whether the download includes a legacy format option for backward compatibility. Converting the file in another application (e.g., Illustrator) and resaving it as a Photoshop-compatible PSD can also resolve opening issues.
Missing Fonts or Assets
Illustrations that include text layers may display missing font warnings if the original typeface isn’t installed on your system. Photoshop will prompt you to substitute the font, but this can alter the design’s appearance. To avoid this, use the font list provided in the illustration’s documentation or download the recommended typeface. Many EpicPxls resources include font details or use widely available fonts to minimize dependency issues. Alternatively, convert text layers to shape layers (right-click > Create Work Path) to preserve the look without requiring the font.
Performance Problems
Large illustration files with numerous layers, smart objects, or high-resolution elements can slow down Photoshop. To improve performance, increase the allocated memory in Edit > Preferences > Performance and set your fastest drive as the scratch disk. Flatten non-essential layers or merge duplicate layers when safe to do so. Working with smart objects? Double-click to edit only when necessary, as each instance loads external data. Saving frequently and using 64-bit version of Photoshop helps manage memory more efficiently, especially when handling complex 200+ resource projects.
Advanced Photoshop Tips for Illustrations
Batch Processing
When working with multiple illustrations—such as a series of icons or product visuals—use Photoshop’s Actions and Batch tools to automate repetitive tasks. Record an action that resizes, applies a filter, or exports in a specific format, then apply it across an entire folder via File > Automate > Batch. This is especially useful for standardizing the 200+ resources from your library before deployment. You can also combine actions with Image Processor for fast batch exporting in multiple formats simultaneously.
Plugins and Extensions
Extend Photoshop’s capabilities with plugins designed for illustrators. Tools that streamline layer management, color syncing, or vector editing can significantly enhance workflow efficiency. Some plugins allow direct integration with online asset libraries, enabling one-click import of illustrations from platforms like EpicPxls. Look for extensions that support SVG optimization, layer naming conventions, or cloud-based asset syncing to keep your resources up to date and easily accessible.
Collaboration Workflows
For team environments, establish a clear collaboration workflow when using shared illustrations. Use cloud storage solutions with version control (like Adobe Creative Cloud or Dropbox) to ensure everyone accesses the latest files. Define naming standards and folder hierarchies so team members can quickly locate assets. When using a centralized library such as the 200+ resources from EpicPxls, assign a team lead to manage downloads, updates, and licensing compliance. Regular sync-ups and shared Photoshop templates can further align design consistency across projects, making collaboration seamless and productive.
Why Download from EpicPxls?
Commercial License
Use in personal and commercial projects
No Account Required
Download free resources instantly
Quality Curated
Every resource is reviewed for quality
Preview Files
See Figma and Photoshop files before downloading
Who Uses These Illustrations?
Professionals and teams who benefit most from our collection
UI/UX Designers
Speed up your workflow with ready-to-use illustrations for Photoshop. Perfect for prototyping and client presentations.
Developers
Get production-ready assets without design skills. Export in any format for web and mobile apps.
Startups & Agencies
Save design budget with affordable premium illustrations. Commercial license included for client work.
Marketing Teams
Create professional campaigns faster. All illustrations are optimized for social media and ads.
Illustrations for Photoshop FAQCommon questions about these resources
Simple, Transparent Pricing
Get unlimited access to all premium resources
Yearly
- 20 downloads per month
- All file formats
- Commercial license
Lifetime
- Unlimited downloads forever
- All file formats
- Commercial license
Ready to Get Started?
Access 4,441+ free design resources today.
Browse Free ResourcesView Premium PlansEarn 85% and
more on all sales
Upload your products and put them up
for sale at whatever price you want.

