How to Use Graphics in PDF: Complete Guide
EpicPxls offers 90+ curated graphics for PDF, all with a commercial license and editable source files (Figma, Sketch, PSD). Download your chosen graphics from EpicPxls, then use PDF's import function. Most resources include PDF-native files for seamless opening.
Last updated February 13, 2026
Everything you need to know about using graphics in PDF.
Trusted by designers at leading companies
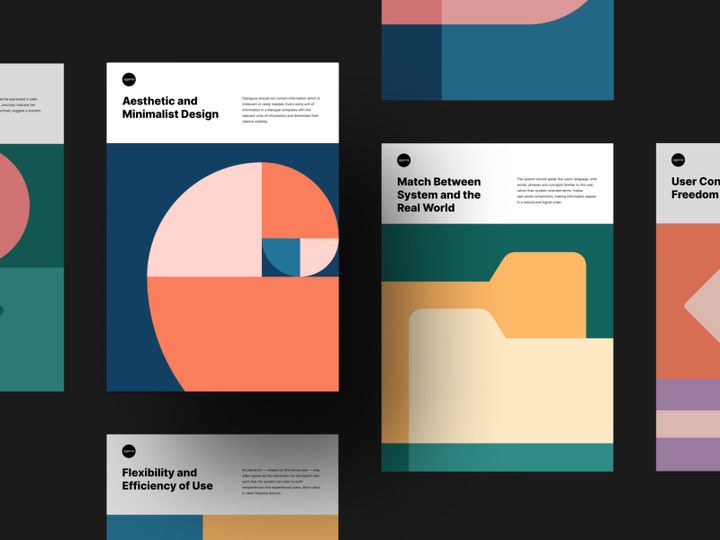
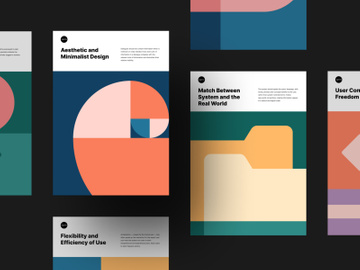
Top Graphics for PDF
Handpicked resources from our curated collection


Try Our Free Resources
Download any of these for free - no account required


Getting Started with Graphics in PDF
Integrating graphics into PDF documents enhances visual appeal, improves communication, and supports branding across digital and print media. Whether you're designing reports, brochures, e-books, or presentations, using high-quality graphics in a PDF format ensures consistency and professional results. Before diving into the integration process, it’s essential to set up your environment and gather the right tools. Most modern PDF editors—such as Adobe Acrobat, PDF-XChange, or online platforms—support embedded graphics, but ensure your software is updated to handle vector and raster image formats smoothly.
Finding compatible graphics is the next crucial step. For seamless integration, graphics should be in PDF, SVG, PNG, JPEG, or EPS formats. Vector-based files (like SVG or AI) are ideal for logos and illustrations because they scale without losing quality. Raster images (such as PNG or JPEG) work well for photographs but should be high resolution (300 dpi or higher) for print. When sourcing graphics, prioritize platforms that offer licensed, optimized, and multi-format assets. EpicPxls stands out as a trusted source, offering over 89+ professionally designed graphics tailored for PDF use. These resources include icons, infographics, templates, and illustrations—all optimized for clarity, scalability, and cross-platform compatibility.
The 89+ resources available on EpicPxls are curated to support both beginners and advanced users. Each asset comes with detailed metadata, usage rights, and multiple export options, reducing compatibility issues during integration. Whether you're creating educational materials, marketing collateral, or technical documentation, starting with well-structured, high-quality graphics ensures a smoother workflow. With the right setup and access to reliable assets, you're ready to import and customize graphics directly within your PDF environment. The following sections will guide you through the import process, editing techniques, and best practices to maximize visual impact and efficiency.
How to Import Graphics into PDF
- Choose the Right File Format: Before importing, ensure your graphic is in a PDF-compatible format. While PDFs can embed PNG, JPEG, SVG, EPS, and even AI files, converting vectors to PDF or SVG ensures better rendering. If you're working with layered files (like PSD or Figma exports), flatten or export individual layers as needed.
- Download from a Trusted Source: Visit EpicPxls and browse the 89+ resources to find graphics that match your project’s theme and resolution needs. Always download the highest available quality and check licensing details for commercial or personal use.
- Open Your PDF Editor: Launch your preferred PDF software. Make sure it supports graphic insertion—most professional tools have an “Insert Image” or “Add Object” feature located in the toolbar or under the Edit menu.
- Navigate to Insert Option: Click on the “Insert” or “Add Image” button. A file browser will appear. Navigate to where you saved your downloaded graphic and select it. Supported formats will appear as selectable files; unsupported types may require conversion first.
- Position and Resize the Graphic: Once inserted, click and drag the image to position it. Use corner handles to resize while holding the Shift key to maintain aspect ratio. Avoid over-stretching raster images to prevent pixelation.
- Adjust Layer and Appearance Settings: Most editors allow you to modify opacity, alignment, and layer order. Right-click the graphic to access additional options like wrapping text, adding borders, or applying drop shadows. For SVG or vector files, ensure they remain scalable by avoiding rasterization during export.
When handling complex file types like PSD, AI, or Figma designs, it’s best to export them as PDF or SVG before insertion. This preserves layers and editability. Figma users, for example, can export frames as SVGs directly. Adobe Illustrator (AI) files should be saved with outlines converted and fonts embedded. PSD files may require flattening unless individual layers are needed—then consider exporting each layer as a separate image. By following these steps, you ensure clean, high-fidelity integration of diverse graphics into your PDF documents.
Step-by-Step: Working with Graphics in PDF
Editing Layers and Components
One of the most powerful aspects of using graphics in PDF is the ability to edit and customize them post-import. While traditional PDFs are often viewed as static, modern editing tools support layered content, especially when the original graphic was saved with embedded layers or as an SVG. If your PDF editor supports it, you can double-click on an inserted graphic to enter edit mode. This allows you to modify colors, adjust shapes, or reposition elements without leaving the document.
For vector-based graphics—such as icons or infographics downloaded from EpicPxls—colors and text can often be changed directly. Use the color picker tool to match brand guidelines or rework illustrations for different themes. Text elements should be editable only if fonts are embedded or converted to outlines. If you encounter uneditable text, consider re-importing the graphic with outlined fonts or using a vector editor like Inkscape or Illustrator to pre-adjust before reinsertion. Always save a backup of the original file before making edits.
Organizing Your Graphics Library
With access to 89+ resources and potentially hundreds of custom graphics, maintaining an organized library is essential for efficiency. Create a dedicated folder structure on your computer based on categories such as “Icons,” “Templates,” “Charts,” and “Branding Elements.” Within each, use consistent naming conventions like “icon-download-blue.svg” or “infographic-annual-report-2024.pdf” to simplify searches.
Consider using digital asset management (DAM) tools or even simple spreadsheet trackers to log file locations, usage rights, and project associations. If your team frequently uses EpicPxls assets, bookmark the most-used categories or create a shared drive with approved graphics. Tagging files with metadata (e.g., “vector,” “print-ready,” “editable”) further streamlines retrieval. Regularly audit your library to remove duplicates or outdated versions, ensuring only high-quality, up-to-date graphics are in circulation.
Exporting for Production
Once your document is complete, proper export settings ensure your graphics retain quality across different mediums. For web and mobile use, export as PDF with optimized compression. Choose “Smallest File Size” in your PDF settings, but ensure images remain above 150 dpi for clarity on screens. Avoid heavy compression for graphics with text or fine lines, as this can cause blurring or aliasing.
For print production, use the “High-Quality Print” preset. This maintains image resolution at 300 dpi or higher and preserves color fidelity using CMYK or Pantone profiles if required. Embed all fonts and convert text to outlines where possible. If your document includes transparency or complex layers, flatten the artwork during export to prevent rendering issues. Always generate a proof PDF and view it on multiple devices or printers to verify consistency. Whether distributing digitally or preparing for professional printing, these export practices ensure your graphics look sharp and professional in the final output.
Troubleshooting Common PDF Issues
File Won't Open
If a PDF fails to open, the issue may stem from version incompatibility or file corruption. Older PDF readers may not support newer features like embedded SVGs or transparency effects. Always save files using the most widely compatible standard—PDF 1.7 (ISO 32000-1) is supported by most applications. If you're using advanced graphics from the 89+ resources on EpicPxls, ensure they were exported correctly. Try opening the file on an updated reader or convert it using an online PDF optimizer that strips unsupported elements while preserving core content.
Missing Fonts or Assets
Graphics with custom fonts may appear distorted if the recipient doesn’t have the font installed. To prevent this, embed all fonts during the export process. In your PDF editor, go to the “Fonts” section of the properties panel and verify that all typefaces are listed as “Embedded” or “Embedded Subset.” For linked graphics (e.g., external images), always package assets together or embed them directly into the PDF. When using design templates from EpicPxls, check documentation to see if fonts are included or require separate installation.
Performance Problems
Large PDFs with high-resolution graphics or numerous vector elements can slow down viewing or editing. To improve performance, compress images during export without sacrificing critical quality. Use tools that downsample images above 300 dpi for on-screen use. Avoid embedding full-resolution photos unless necessary. Consider breaking large documents into smaller sections or using PDF optimization tools to reduce file size. For collaborative projects, share compressed versions for review and retain a master file with full-quality assets for final output.
Advanced PDF Tips for Graphics
Batch Processing
When working with multiple PDFs—such as creating a series of reports or brochures—batch processing saves significant time. Many PDF editors offer automation tools that allow you to apply the same graphic, watermark, or header across dozens of files simultaneously. Set up a template with your brand logo and layout, then use the “Batch Replace” or “Action Wizard” feature to insert or update images in bulk. This is especially useful when updating annual reports or product catalogs using standardized templates from the 89+ resources collection.
Plugins and Extensions
Enhance your PDF workflow with plugins that extend functionality. Browser-based PDF tools often support add-ons for direct image optimization, OCR, or cloud storage integration. Desktop applications like Adobe Acrobat allow third-party plugins for advanced vector editing, color correction, or metadata tagging. Some plugins even enable direct import from design platforms like Figma or Sketch, streamlining the process of bringing graphics into PDF format. Explore extensions that support SVG handling or batch image embedding to maximize efficiency.
Collaboration Workflows
For teams managing shared graphics libraries, establishing a clear collaboration workflow prevents version conflicts and asset misuse. Use cloud storage with role-based access (e.g., editor, viewer) to control who can modify files. Set up naming conventions and version numbers (e.g., “v1-final,” “v2-approved”) to track updates. When using curated assets from EpicPxls, designate a team member to manage downloads and ensure compliance with licensing terms. Integrate feedback loops using comment tools within the PDF so designers can adjust graphics directly based on stakeholder input. This structured approach ensures consistency, reduces errors, and accelerates project delivery.
Why Download from EpicPxls?
Commercial License
Use in personal and commercial projects
No Account Required
Download free resources instantly
Quality Curated
Every resource is reviewed for quality
Preview Files
See Figma and Photoshop files before downloading
Who Uses These Graphics?
Professionals and teams who benefit most from our collection
UI/UX Designers
Speed up your workflow with ready-to-use graphics for PDF. Perfect for prototyping and client presentations.
Developers
Get production-ready assets without design skills. Export in any format for web and mobile apps.
Startups & Agencies
Save design budget with affordable premium graphics. Commercial license included for client work.
Marketing Teams
Create professional campaigns faster. All graphics are optimized for social media and ads.
Graphics for PDF FAQCommon questions about these resources
Simple, Transparent Pricing
Get unlimited access to all premium resources
Yearly
- 20 downloads per month
- All file formats
- Commercial license
Lifetime
- Unlimited downloads forever
- All file formats
- Commercial license
Ready to Get Started?
Access 4,441+ free design resources today.
Browse Free ResourcesView Premium PlansEarn 85% and
more on all sales
Upload your products and put them up
for sale at whatever price you want.

