How to Make a Cake Topper
You can top a cake three ways: a quick paper or cardstock cutout on skewers, a Cricut or vinyl cut from Design Space, or a 3D-printed piece (and a similar look from ordered acrylic). Pick the path that matches your tools—each ends with the same finish: wording on sticks, inserted just before you serve.
Updated 12 de octubre de 2026
Materials
What you need depends on the method:
- Cardstock toppers: 250–300 gsm cardstock, a printer, scissors or a craft knife, wooden skewers or lollipop sticks, glue or tape
- Cricut / vinyl: cardstock or adhesive vinyl, a cutting mat, weeding tools, transfer tape if needed, plus a stick
- 3D-printed: a 3D printer, PLA or PETG filament, a slicer (Cura, PrusaSlicer, or Bambu Studio), and a food barrier (foil or a topper holder) for the stick
- Acrylic: cast acrylic sheet plus a laser cutter, or a custom order from an online shop
Short phrases (“Happy 8th”, a name, “Mr & Mrs”) read better than long sentences. Keep glitter, toner, and adhesives on the back of the piece when you can so the front looks clean in photos.
If you are new to cake decorating, start with cardstock—it is inexpensive, forgiving, and easy to replace if a letter tears while you cut.
Printable cardstock method
This path uses any editor you already like—Word, Google Docs, Canva, Affinity, Illustrator, or even a neat hand-drawn template. You do not need our website for the steps below.
- Choose wording and width. Use the sizing table later in this guide (about 60–70% of your cake diameter). Sketch one or two lines that fit that width.
- Typeset or draw the design. Pick a bold, readable font. Leave a little space between letters so cutting is easier.
- Print at 100% scale. Use 250–300 gsm cardstock in your printer if it accepts heavy paper; otherwise print on label stock and mount to cardstock. Do not choose “fit to page.”
- Print a second copy if you plan to double-layer for stiffness.
- Cut out the shape. Scissors work for simple outlines; a craft knife and mat help on inner holes and tight curves.
- Glue the layers together. Align the two cutouts exactly and press until dry so the topper stays flat.
- Tape the stick between the layers. Center a skewer or lollipop stick so wood stays behind the paper face. Reinforce with tape on the back.
- Insert just before serving. Humidity softens paper quickly—add the topper at the last minute.
Tip: If you want a quick visual check on wording or width, the cake topper generator shows a live 3D preview in millimeters. It is optional for paper toppers and does not replace your print file.
Cricut or vinyl
Open Cricut Design Space (or your cutter’s software) and type your phrase with the text tool, or upload vector artwork as SVG if you already have it. Size the design using the same 60–70% width rule, mirror if your material needs it, then cut glitter or solid cardstock—or vinyl for a sticker-style look.
Weed the cut, use a light-grip mat on delicate paper, and attach a skewer with tape on the back. Print-then-cut works when you want full-color letters on white stock. Our generator is not part of this workflow; it does not supply cut files for Cricut.
Cake topper sizing (round cakes)
Aim for a topper width about 60–70% of the cake diameter so it reads clearly without overpowering the tiers.
| Cake diameter | Suggested topper width (60–70%) | Handy width check in generator (mm) |
|---|---|---|
| 6 inch (15 cm) | 3.6–4.2 in (9–11 cm) | 95–110 mm |
| 8 inch (20 cm) | 4.8–5.6 in (12–14 cm) | 125–145 mm |
| 10 inch (25 cm) | 6.0–7.0 in (15–18 cm) | 155–180 mm |
On square cakes, measure one side of the top tier and multiply by 0.6–0.7. For tiered cakes, size to the top tier, not the widest layer.
3D-printed cake topper (free generator)
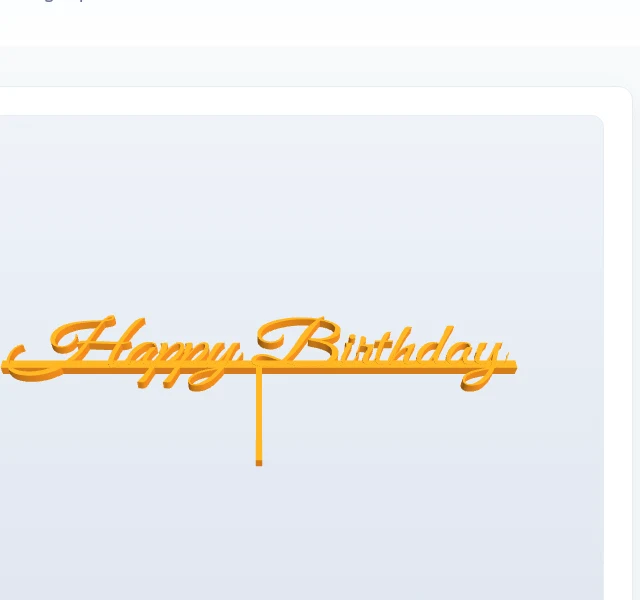
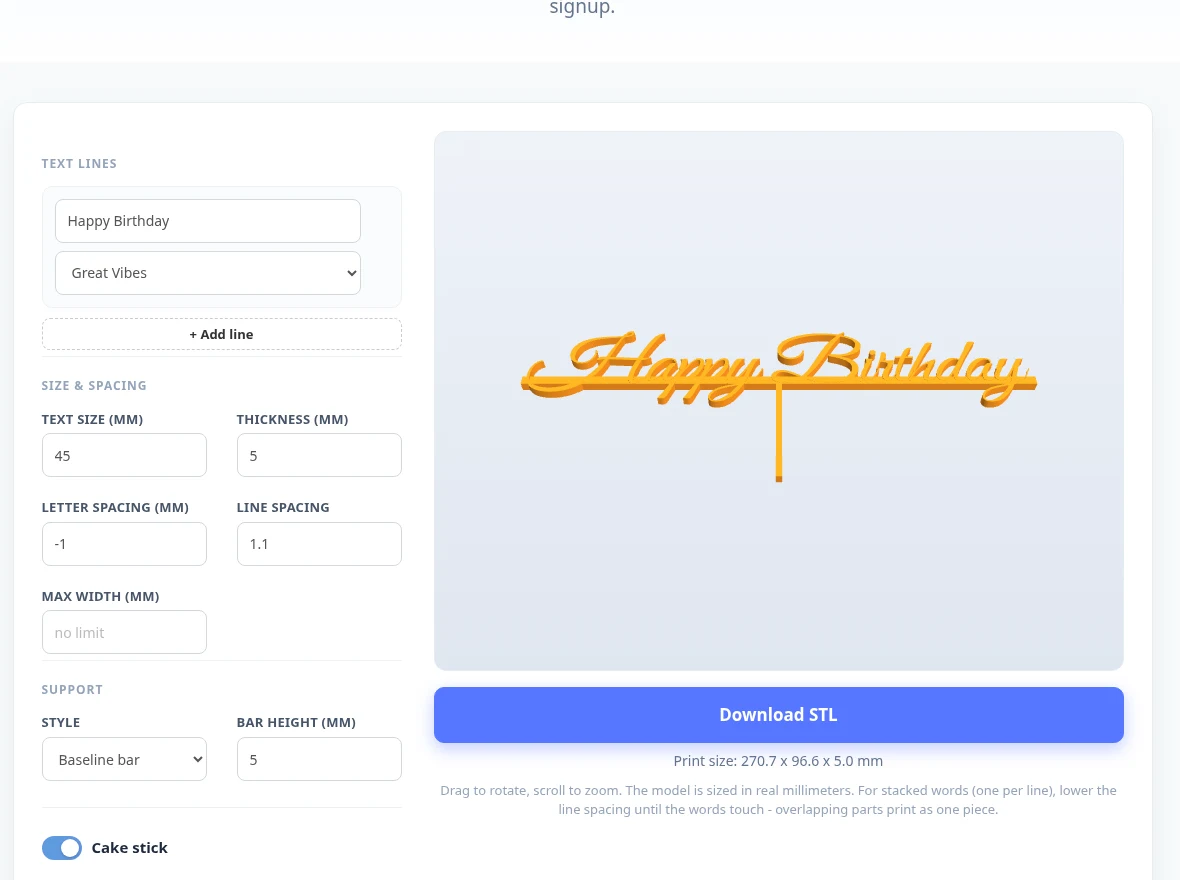
If you own a 3D printer, EpicPxls hosts a free browser tool that turns your text into one connected STL file—text, support base, and optional stick included. No signup and no upload; the model is built on your device.
- Open the generator and type your text. Add a name, age, or short message on one or more lines.
- Pick a font and set the width. Match max width (mm) to the sizing table so the topper fits your cake.
- Tune the stick and support. Leave the cake stick on for a one-piece print, or adjust bar/plate style so letters connect on the bed.
- Download the STL. Save the millimeter-scaled file to your computer.
- Slice in Cura, PrusaSlicer, or Bambu Studio. Import at 100% scale, add supports only if your slicer suggests them for overhangs, and choose sensible infill.
- Print in PLA or PETG. These are common decorative filaments; treat the topper as non-food-contact and keep plastic out of frosting.
- Add a barrier on the stick. Wrap the stem in food-safe foil or use a holder so plastic does not touch the cake.
- Insert just before serving. Painted or sealed prints need time to off-gas—finish decorating at least a day ahead if you spray paint.
Acrylic toppers
Cast acrylic gives a wedding-cake polish: mirrored gold, clear script, or painted backs. You need a laser cutter, ventilation, and the right acrylic thickness for your machine—or send vector art to a shop that laser-cuts to order. Flame-polished edges look best. Acrylic is decorative only; do not let cut edges rest in frosting.
Many couples keep acrylic toppers as keepsakes because they wipe clean and store flat.
Food-safety tips
- Do not rest bare paper, glitter, or vinyl in buttercream without a stick barrier; remove the topper before eating that area.
- Keep toppers away from lit candles—LED candles are safer on children’s cakes.
- For 3D prints, wrap the stick or use a holder so plastic does not contact frosting. PLA and PETG are for decoration, not direct food contact.
Treat every topper as a removable decoration. That habit keeps adhesives, toner, and filament away from what guests eat.
Planning the rest of the party? Add a matching custom birthday poster made from a photo with our AI Photo Studio (needs an account).
Frequently asked questions
What paper should I use for a printable cake topper?
Use 250–300 gsm cardstock so the letters stay stiff. Cover stock or heavy scrapbook paper works; avoid regular printer paper, which curls in frosting humidity. For extra sparkle, glitter cardstock is fine if you keep the paper above the cake on sticks.
How do I make a cake topper stand up?
Tape or glue wooden skewers or lollipop sticks between two cut layers so the stick is hidden but strong. For 3D-printed toppers, use the generator’s stick option and wrap the plastic before it touches cake. Insert the topper just before serving so the paper stays crisp.
How far ahead can I make a cake topper?
Flat cardstock toppers keep for several days in a dry place inside a zip bag. Assemble the stick and layers the day of the party. 3D-printed PLA toppers can be made a week ahead; paint and seal them at least a day before so fumes dissipate.
Can I make a cake topper without a Cricut?
Yes. Print your design on heavy cardstock and cut it with scissors or a craft knife, then double-layer and tape a skewer between the sheets. A Cricut is optional for faster cutting or vinyl.
Is the EpicPxls cake topper generator free?
Yes. The generator is free, requires no signup, and downloads an STL for 3D printing. It runs in your browser with no upload—the model is built on your device.
Gana el 85% y
más en todas las ventas
Sube tus productos y ponlos
a la venta al precio que desees.


